✕
What issue are you experiencing?
Cracks, water intrusion, crawl space moisture, settlement, etc.
Cracks, water intrusion, crawl space moisture, settlement, etc.

When water collects in your crawl space, it does terrible things to your foundation, to your home’s flooring structure, and to your overall air quality. These are the top three reasons you should eliminate water in your crawl space.
But there’s a big difference between knowing you need your crawl space waterproofed, and understanding how waterproofing actually works.
Acculevel is a family-owned and operated company that has been waterproofing crawl spaces since their founding in 1996. We’ve helped thousands of homeowners return their home’s crawl spaces into healthy and structurally sound foundation levels. And we’ve helped thousands more turn those crawl spaces into viable storage areas with encapsulation.
This blog is going to be a step by step guide to how we install our high quality geochannel water drainage and how it works.
FYI: before you hire a contractor, check your crawl space for accessibility. There needs to be enough room for workers and their equipment to make repairs.
There’s rarely a true ‘floor’ in a crawl space; most of them are simply dirt under your house. Because of this, builders often place a vapor barrier on the ground when they build a home. A vapor barrier is a sheet of plastic liner that is placed in your crawl space. It isn’t attached to anything; it’s simply a physical barrier to help block out the odors and vapors that evaporate from the earth.
Over time, this vapor barrier deteriorates, shifts when water intrudes, gets moved when repairs to pipes or other utilities are made, and stops being effective. Most vapor barriers lose functionality after 5-10 years, depending on how damp your crawl space is.
If you have fiberglass insulation in your crawl space, there’s a good chance it’s no longer in place. In the past, builders thought this was the best type of insulation for a crawl space; we’ve since learned this is not true. Fiberglass insulation absorbs moisture like a sponge, gradually gaining weight until it falls down.
Your old vapor barrier, falling insulation, and any other miscellaneous debris should be removed before water drainage is installed.
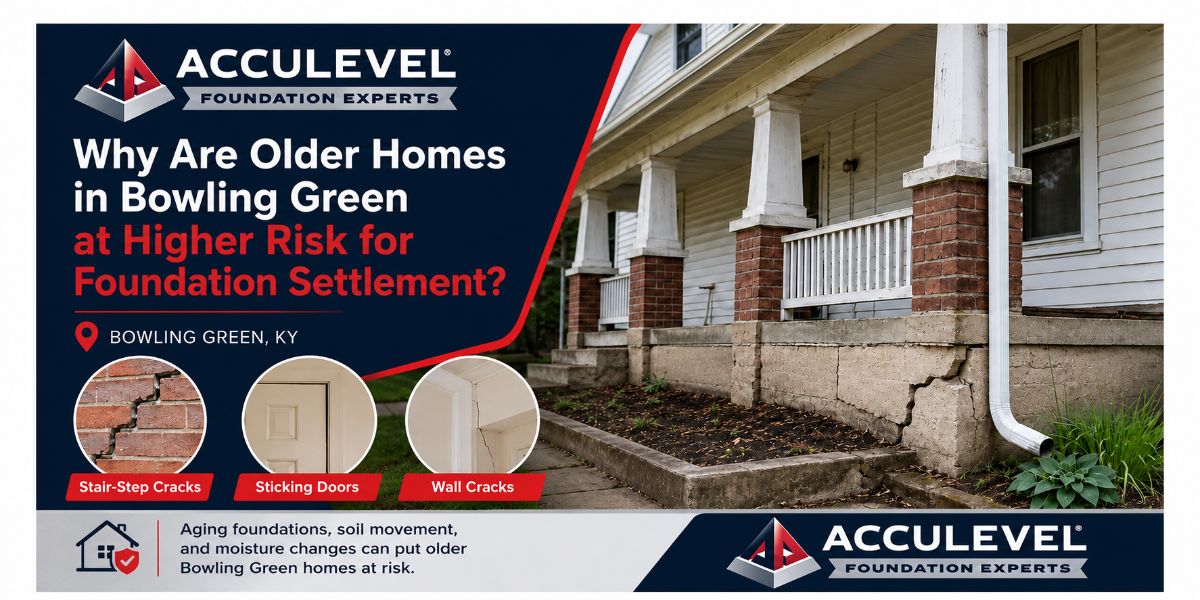
 These photos were taken by the author in Acculevel’s workshop. The top image is geochannel from the side, the bottom is geochannel from the end.
Water drainage should be installed along the inside perimeter of your foundation. This will allow the drainage to collect the water as soon as it seeps into the crawl space. You’ll notice the fuzzy outer coating on the geochannel track (in the pictures above). This is a type of fabric developed specifically to filter out dirt, sand, and other detritus; this is what prevents the system from clogging.
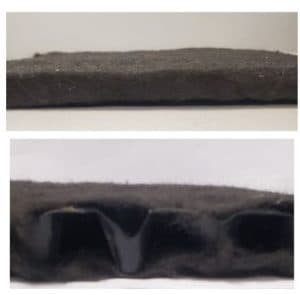
The trench is dug around the interior of your crawl space, then the geochannel track is placed. Displaced soil is used to fill around the track and to help “set” it into place. The picture below illustrates what the installation looks like when complete.
 This photo was taken by an Acculevel team leader during geochannel installation.
Now, any water that comes in along the base of the foundation will seep through the filter and into the geochannel. The geochannel track will collect and drain the water into a “pit” that holds the sump pump.
When enough water collects in the pit, the sump pump comes on and expels the water out of the crawl space through a drainage line.
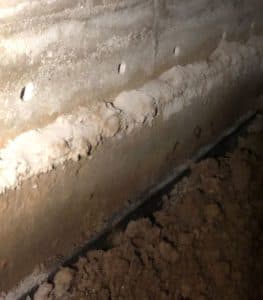
 This photo was taken by an Acculevel team leader during installation. In this crawl space, we removed fallen insulation, installed a vapor barrier, and installed spray foam insulation.
Once the water drainage system is installed, you have two options: install a new vapor barrier or encapsulate the crawl space.
Technically, you have a third option- you can choose not to do either. But we strongly urge you to do one of the two. A vapor barrier is the minimal choice; the plastic liner will help reduce moisture, gases, and vapors from getting into the crawl space.
But the ideal option is encapsulation. There are three major benefits to encapsulation:
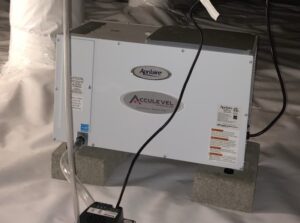
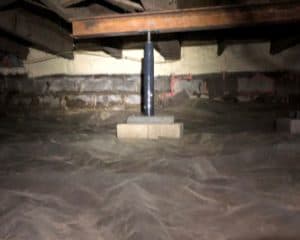
This photo was taken by an Acculevel team leader after installation. A dehumidifier and sump pump are installed in an encapsulated crawl space.
Encapsulation uses a much heavier liner than a vapor barrier. Vapor barrier plastic is 3-6 millimeters thick and lasts 5-10 years. White cap is 20 millimeters thick and lasts 25 years. (At Acculevel, encapsulation comes with a 25 year warranty.)
The encapsulation liner completely encloses the crawl space, and all seams are tightly sealed. This liner is also run up the walls and sealed to the wooden flooring structure, using spray foam insulation.
Lastly, if you encapsulate your crawl space, you need to install a dehumidifier. This may be confusing to you- haven’t you eliminated the moisture?! But in the midwest, there’s no way to completely remove it without the addition of a dehumidifier.
This is because of the wide temperature variations we experience. When it’s warm in your crawl space and cool outside - or vice versa- condensation will form on the liner. That condensation works just like the water that was seeping through your foundation; it will collect and feed mildew or mold. A dehumidifier will eliminate that, and the water line can be drained into the sump pump pit.
Please check out our Crawl Space Repair Guide for homeowners. Our goal with this guide is to address all of our customers' frequently asked questions, explore what causes the most typical problems, and review the solutions to those problems. We also provide pricing for these repairs, explain how the repairs are made, and how you can prevent issues in the future.

Has it been a while since you hired a contractor to work on your home? Uneasy about screening out questionable business practices? Please use our guide: Questions to Ask a Contractor. The blog article gives our answers to these questions, and includes a link to a free blank questionnaire you can use to protect yourself.
If you live in Indiana or the surrounding states, contact Acculevel. We specialize in crawl space repairs, basement waterproofing near you, and provide free estimates to all our customers. Contact our office, and one of our friendly staff will schedule an appointment for you with one of our experienced project advisors. He or she will evaluate your house and its symptoms, then recommend the best course of action for you, to keep your home strong and healthy for years to come.
Acculevel’s goal is to do the best and most thorough repair possible, to protect and maintain your home. We know that allowing our employees into your home demonstrates trust, and we intend to repay that trust with the absolute best in customer service. Acculevel is accredited by the BBB, has an A+ rating, and average 5 stars on customer reviews.
[DISPLAY_ULTIMATE_SOCIAL_ICONS]